
The Dental Veneers Procedure: Step-by-Step Guide
This step-by-step guide will walk you through the entire dental veneer procedure, from the initial consultation to the final result. You will understand each stage comprehensively, empowering you to make an informed decision about your dental health.
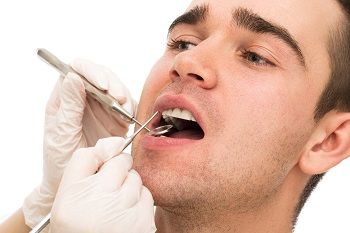
Initial Consultation
One of the essential purposes of the initial consultation is to evaluate your oral health and determine the suitability of dental veneers for your specific case. Your dentist will closely examine your teeth, gums, and bite, noting any pre-existing dental conditions that may impact the success of the veneer procedure.
Furthermore, the consultation is an excellent opportunity for you to communicate your cosmetic goals and expectations. You can express your desires for a brighter, more symmetrical, or flawless smile. Through open and honest communication, your dentist will gain valuable insights into your vision, enabling them to tailor the treatment plan accordingly.
During this consultation, your dentist may also present you with visual aids, such as photographs or digital simulations, to help you visualize the potential outcome of your veneers. This can be particularly helpful in setting realistic expectations and ensuring that you and your dentist are on the same page regarding the desired result.
Additionally, your dentist will discuss the different types of veneers available (such as porcelain or composite veneers) and their respective advantages and considerations. Together, you can decide the most suitable material for your veneers based on durability, aesthetics, and budget.
Teeth Preparation
One of the key steps in the dental veneer procedure is teeth preparation. This meticulous process sets the foundation for your veneers' successful placement and long-term stability. During this stage, your dentist carefully prepares your teeth to ensure the veneers' optimal fit, function, and aesthetics.
To begin the teeth preparation, your dentist will administer local anesthesia if necessary, ensuring your comfort throughout the procedure. Once you're numb and relaxed, the dentist will carefully remove a thin layer of enamel from the front surface of the teeth that will receive the veneers.
The amount of enamel removed is typically minimal, usually less than a millimeter, and is equivalent to the veneers' thickness. This ensures that the final veneers will blend seamlessly with your natural teeth and not appear bulky or artificial.

Your dentist will use specialized dental instruments to precisely shape and contour the teeth. They may also consider the desired outcome discussed during the treatment planning stage, such as improving the symmetry or alignment of your smile. The aim is to create an ideal tooth surface that will allow for the proper placement and alignment of the veneers.
Impressions and Temporary Veneers
After your teeth have been carefully prepared for dental veneers, the next step involves taking impressions or digital scans of your teeth. These impressions are a crucial blueprint that guides skilled dental technicians in creating custom-made, lifelike veneers.
Impressions are typically taken using a soft putty-like material placed into a tray and then pressed onto your teeth. This process lets the material capture a replica of your tooth structure and surrounding tissues. Alternatively, digital scans may be used, where a handheld wand captures detailed 3D images of your teeth, creating a virtual model.
The impressions or digital scans are then sent to the dental laboratory, where skilled technicians use them as a guide to fabricate your permanent veneers. They will carefully craft each veneer to match the size, shape, and color specifications discussed during the treatment planning stage.
While your permanent veneers are being created in the dental laboratory, your dentist will place the temporary veneers on your prepared teeth. These temporary veneers are usually made from a tooth-colored composite resin material and serve multiple purposes.
Bonding Appointment
During the bonding appointment, your dentist will carefully evaluate each veneer to ensure its fit, shape, and color alignment. They will pay close attention to the details discussed during the treatment planning stage to ensure that the veneers meet your desired aesthetic goals.
For bonding, your dentist will clean and etch the surfaces of the prepared teeth. This creates a roughened texture that helps facilitate a strong bond between the veneers and the tooth surfaces. Your dentist may also apply a bonding agent to enhance the adhesion between the veneers and your teeth.
Once the bonding agent is applied, your dentist will meticulously position each veneer onto its corresponding tooth. They will ensure that the fit is precise, the alignment is harmonious, and the veneers blend seamlessly with your natural teeth. The dentist will take the time to make any necessary adjustments to achieve an optimal result.
Once the veneers are in the ideal position, a specialized dental cement is applied to securely bond them to your teeth. The cement is carefully cured using a dental curing light, which activates the chemical reaction and facilitates the hardening process. This ensures a strong and durable bond between the veneers and your natural tooth structure.
Final adjustment
The stage of final adjustments is a crucial step in the dental veneers procedure, as it allows your dentist to fine-tune the fit, comfort, and aesthetics of your newly placed veneers. This meticulous process ensures that your veneers look stunning, seamlessly integrate with your natural teeth, and provide a harmonious smile.
During this stage, your dentist will thoroughly evaluate the fit and alignment of each veneer. They will assess the bite and make any necessary adjustments to ensure that your teeth come together correctly when you bite down. This step ensures proper function and prevents discomfort or strain on teeth and jaw joints.
Your dentist will also pay close attention to the appearance of your veneers. They will evaluate the veneers' shape, size, and color with your natural teeth and overall facial features. If needed, your dentist may make subtle modifications to enhance the aesthetics, symmetry, and blend of the veneers with your natural teeth.
Communication is key during this stage, and your input is highly valued. If you have any concerns or specific aspects of the veneers that you would like to address, such as shape or color, don't hesitate to share your thoughts with your dentist. They will listen attentively and make the necessary adjustments to ensure your satisfaction.
Sometimes, your dentist may utilize various techniques, such as polishing or reshaping the veneers, to achieve the desired outcome. These adjustments may involve subtle refinements contributing to your smile's overall beauty and natural appearance.
It's important to remember that the final adjustment stage is an opportunity for you to actively participate in shaping your smile. Your dentist's expertise and your feedback work together to create a result that aligns with your aesthetic goals and brings you confidence and satisfaction.
Once the final adjustments have been made, the transformation of your smile is complete. Your dentist will provide instructions on maintaining and caring for your veneers, ensuring their longevity and optimal performance.
Post-Procedure Care
- Maintain Excellent Oral Hygiene: Continue practicing good oral hygiene by brushing your teeth and flossing daily. Use a soft-bristled toothbrush and non-abrasive toothpaste to protect the surface of your veneers. Consider using a fluoride mouthwash recommended by your dentist to strengthen your teeth and protect against decay.
- Avoid Staining Substances: While veneers resist staining, it's still a good idea to avoid or limit the consumption of coffee, tea, red wine, and tobacco products. If you indulge, rinse your mouth with water afterward or brush your teeth to minimize the risk of surface discoloration.
- Be Mindful of Food Choices: Exercise caution when consuming hard or sticky foods that can potentially damage or dislodge your veneers. Avoid biting into hard objects like ice, popcorn kernels, or pens. Cut or break down large and tough foods into smaller, manageable pieces.
- Wear a Mouthguard: If you are into sports or activities with a dental injury risk, protect your investment by wearing a mouthguard. Custom-fitted mouthguards from your dentist offer the best protection for your veneers and natural teeth.
- Regular Dental Check-ups: Schedule and attend regular dental check-ups and cleanings as your dentist recommends. These visits help your dentist assess the condition of your veneers, monitor your oral health, and perform professional cleanings to maintain their luster.
- Address Bruxism or Teeth Grinding: If you grind or clench your teeth, known as bruxism, inform your dentist. They may recommend a nightguard or other treatment options to protect your veneers from the excessive forces and potential damage caused by bruxism.
- Maintain Communication with Your Dentist: If you have any concerns or questions or notice any changes with your veneers, don't hesitate to contact your dentist.
Contact your Lafayette Dentist, Dr. Massood Darvishzadeh, DDS at Lafayette Dental Group, to learn more about The Dental Veneers Procedure: Step-by-Step Guide.
Resource:
Dental Crown vs. Veneers: Which Is Right for You?
*This media/content or any other on this website does not prescribe, recommend, or prevent any treatment or procedure. Therefore, we highly recommend that you get the advice of a qualified dentist or other medical practitioners regarding your specific dental condition.*
Services
Contact Us
3466 Mt Diablo Blvd., Suite C207
Lafayette, CA 94549
Follow Us
2026 © Lafayette Dental Group | All rights reserved | Accessibility | Privacy Policy | Terms & Conditions | Powered by Vigorant, Inc.